


Table of Content
- Media Server Installation
- Turn/Coturn Server Installation
- Other Tools Installation
- LLMeetings Server Installation
Media Server Installation
Install Docker
Docker will be the container of Kurento-Media-Server, wich we´ll need for micro-audio, cam,recordings and share desktop.
Update the system:
sudo apt updateInstall some needed packets:
sudo apt install apt-transport-https ca-certificates curl software-properties-common -y..add the GPG key for the oficial Docker repo:
curl -fsSL https://download.docker.com/linux/ubuntu/gpg | sudo apt-key add -…and now add the repo to our APT:
sudo add-apt-repository "deb [arch=amd64] https://download.docker.com/linux/ubuntu
$(lsb_release -cs) stable"
…update to take effect the changes:
sudo apt update…and now to be sure Docker will be installed from the repo we´ve added, run this command:
apt-cache policy docker-ce…must show something similar to this:
docker-ce:
  Installed: 5:23.0.4-1~ubuntu.20.04~focal
  Candidate: 5:24.0.2-1~ubuntu.20.04~focal
  Version table:
     5:24.0.2-1~ubuntu.20.04~focal 500
        500 https://download.docker.com/linux/ubuntu focal/stable amd64 Packages
…and install Docker:
sudo apt install docker-ce -y…we check that the installation was right and is running:
sudo systemctl status docker…and will show something similar to this:
● docker.service - Docker Application Container Engine
     Loaded: loaded (/lib/systemd/system/docker.service; enabled; vendor preset: enabled)
     Active: active (running) since Sun 2024-09-22 20:52:59 CST; 4min 21s ago
TriggeredBy: ● docker.socket
       Docs: https://docs.docker.com
   Main PID: 962 (dockerd)
      Tasks: 8
     Memory: 100.0M
     CGroup: /system.slice/docker.service
             └─962 /usr/bin/dockerd -H fd:// --containerd=/run/containerd/containerd.sock
Docker Image
The default config of LLMeetings and Kurento Media Server is a 1:1 mapping. Each LLMeetings instance is mapped exactly to 1 KMS instance as well as LLMeetings and KMS running on the same host.
The quickest and easiest way to run KMS is via Docker. But running the following commands you can run KMS locally only if you are an experienced docker user.
// for example /home/$user/work/openmeetings
export OM_HOME=$YOUR_PATH
// for example export OM_HOME=/Users/wagns1/Documents/openmeetings/_REPO/openmeetings \
/op enmeetings-web/target/openmeetings-web-5.0.0-M5-SNAPSHOT
docker run -v $OM_HOME/data:$OM_HOME/data -p 8888:8888 kurento/kurento-media-server
Each instance of LLMeetings requires a running Kurento Media Server (KMS). There is a complete list of installation modes here: Install Kurento Media server.
The kurento-media-server Docker image is a nice all-in-one package for an easy quick start. It comes with all the default settings, which is enough to let you try the Tutorials.
If you need to insert or extract files from a Docker container, there is a variety of methods: You could use a bind mount; a volume; cp some files from an already existing container; change your ENTRYPOINT to generate or copy the files at startup; or base FROM this Docker image and build a new one with your own customizations. Check Kurento in Docker for an example of how to use bind-mounts to provide your own configuration files.
These are the exact contents of the image:
- A local apt-get installation of KMS, as described in Local Installation, plus all its extra plugins (chroma, platedetector, etc).
- Debug symbols installed, as described in Install debug symbols. This allows getting useful stack traces in case the KMS process crashes. If this happens, please report a bug.
- All default settings from the local installation, as found in
Running
Docker allows to fine-tune how a container runs, so you’ll want to read the Docker run reference and find out the command options that are needed for your project.
This is a good starting point, which runs the latest Kurento Media Server image with default options:
docker pull kurento/kurento-media-server:7.1.0

docker run -d --name kurento --network host kurento/kurento-media-server:7.1.0
By default, KMS listens on the port 8888. Clients wanting to control the media server using the Kurento Protocol should open a WebSocket connection to that port, either directly or by means of one of the provided Client API Reference SDKs.
The health checker script inside this Docker image does something very similar in order to check if the container is healthy.
Once the container is running, you can get its log output with the docker logs command:
docker logs --follow kms >"kms-$(date '+%Y%m%dT%H%M%S').log" 2>&1For more details about KMS logs, check Debug Logging.
Why host networking
Notice how our suggested docker run command uses – – network host? Using Host Networking is recommended for software like proxies and media servers, because otherwise publishing large ranges of container ports would consume a lot of memory. You can read more about this issue in our Troubleshooting Guide.
The Host Networking driver only works on Linux hosts, so if you are using Docker for Mac or Windows then you’ll need to understand that the Docker network gateway acts as a NAT between your host and your container. To use KMS without STUN (e.g. if you are just testing some of the Tutorials) you’ll need to publish all required ports where KMS will listen for incoming data.
For example, if you use Docker for Mac and want to have KMS listening on the UDP port range [5000, 5050] (thus allowing incoming data on those ports), plus the TCP port 8888 for the Client API Reference, run:
docker run --rm \
    -p 8888:8888/tcp \
    -p 5000-5050:5000-5050/udp \
    -e KMS_MIN_PORT=5000 \
    -e KMS_MAX_PORT=5050 \
    kurento/kurento-media-server:7.1.0
Docker Upgrade
One of the nicest things about the Docker deployment method is that changing versions, or upgrading, is almost trivially easy. Just pull the new image version and use it to run your new container:
# Download the new image version:
docker pull kurento/kurento-media-server:7.1.0

# Create a new container based on the new version of KMS:
docker run [...] kurento/kurento-media-server:7.1.0
Local Installation
We highly recommend local installation option in product environment. With this method, you will install Kurento Media Server from the native Ubuntu packages built by the team.
Officially supported platforms: Ubuntu 24.04 (noble) (64-bits).
Open a terminal and run these commands:
- Make sure that GnuPG is installed.
sudo apt-get update ; sudo apt-get install --no-install-recommends gnupg- Add the Kurento repository to your system configuration. Run these commands:
# Get DISTRIB_* env vars.
source /etc/upstream-release/lsb-release 2>/dev/null || source /etc/lsb-release

# Add Kurento repository key for apt-get.
sudo apt-key adv \
    --keyserver hkp://keyserver.ubuntu.com:80 \
    --recv-keys 234821A61B67740F89BFD669FC8A16625AFA7A83

# Add Kurento repository line for apt-get.
sudo tee "/etc/apt/sources.list.d/kurento.list" >/dev/null <<EOF
# Kurento Media Server - Release packages
deb [arch=amd64] http://ubuntu.openvidu.io/7.1.0 $DISTRIB_CODENAME main
EOF- Install KMS
Note:This step applies only for a first time installation. If you already have installed Kurento and want to upgrade it, follow instead the steps described here: Local Upgrade.
sudo apt-get update ; sudo apt-get install --no-install-recommends \
    kurento-media-server
This will install the release version of Kurento Media Server.
Local Upgrade
To upgrade a local installation of Kurento Media Server, you have to write the new version number into the file /etc/apt/sources.list.d/kurento.list, which was created during Local Installation. After editing that file, you can choose between 2 options to actually apply the upgrade:
A. Upgrade all system packages.
This is the standard procedure expected by Debian & Ubuntu maintainer methodology. Upgrading all system packages is a way to ensure that everything is set to the latest version, and all bug fixes & security updates are applied too, so this is the most recommended method:
sudo apt-get update ; sudo apt-get dist-upgradeHowever, don’t do this inside a Docker container. Running apt-get upgrade or apt-get dist-upgrade is frowned upon by the Docker best practices; instead, you should just move to a newer version of the Kurento Docker images.
B. Uninstall the old Kurento version, before installing the new one.
Note however that apt-get is not good enough to remove all of Kurento packages. We recommend that you use aptitude for this, which works much better than apt-get:
sudo aptitude remove '?installed?version(kurento)'

sudo apt-get update ; sudo apt-get install --no-install-recommends \
    kurento-media-server
Turn/Coturn Server Installation
Kurento Media Server, just like any WebRTC endpoint, will work fine on its own, for LAN connections or for servers which have a public IP address assigned to them. However, sooner or later you will want to make your application work in a cloud environment with NAT firewalls, and allow KMS to connect with remote clients. At the same time, remote clients will probably want to connect from behind their own NAT router too, so your application needs to be prepared to perform NAT Traversal in both sides. This can be done by setting up a STUN server or a TURN relay, and configuring it in both KMS and the client browser.
How to install Coturn
Coturn is a STUN server and TURN relay, supporting all features required for the ICE protocol and allowing to establish WebRTC connections from behind a NAT.
Coturn can be installed directly from the Ubuntu package repositories:
sudo apt-get update ; sudo apt-get install --no-install-recommends coturnTo configure it for WebRTC, follow these steps:
- Edit /etc/turnserver.conf.
# The external IP address of this server, if Coturn is behind a NAT.
# It must be an IP address, not a domain name.
#external-ip=<CoturnIp>

# STUN listener port for UDP and TCP.
# Default: 3478.
#listening-port=3478

# TURN lower and upper bounds of the UDP relay ports.
# Default: 49152, 65535.
#min-port=49152
#max-port=65535

# Uncomment to enable moderately verbose logs.
# Default: verbose mode OFF.
#verbose

# TURN fingerprints in messages.
fingerprint

# TURN long-term credential mechanism.
lt-cred-mech

# TURN static user account for long-term credential mechanism.
user=<TurnUser>:<TurnPassword>

# TURN realm used for the long-term credential mechanism.
realm=kurento.org

# Set the log file name.
# The log file can be reset sending a SIGHUP signal to the turnserver process.
log-file=/var/log/turn.log

# Disable log file rollover and use log file name as-is.
simple-log- The external-ip is necessary in cloud providers that use internal NATs, such as AWS (Amazon EC2). Uncomment this line and write the machine’s public IP address in the field <CoturnIp>. It must be an IP address, not a domain name.
- Comment out (or delete) all the TURN parameters if you only want Coturn acting as a STUN server.
- Create the destination log file, otherwise Coturn will not have permissions to create the file by itself:
sudo install -o turnserver -g turnserver -m 644 /dev/null var/log/turn.log- Other settings can be tuned as needed. For more information, check the Coturn help pages:
- Main project page: https://github.com/coturn/coturn/wiki/turnserver
- Fully commented configuration file: https://github.com/coturn/coturn/blob/master/examples/etc/turnserver.conf
- Additional docs on configuration: https://github.com/coturn/coturn/wiki/CoturnConfig
Edit the file /etc/default/conturn and uncomment or add this line:
- Edit the file /etc/default/coturn and uncomment or add this line:
TURNSERVER_ENABLED=1- Start the Coturn system service:
sudo service coturn restart- The following ports should be open in your firewall / NAT / cloud provider’s Security Group:
- listening-port (default: 3478) UDP & TCP. You can skip opening one of the protocols if you disable either UDP or TCP in Coturn (for example, with no-tcp).
- All the range from min-port to max-port (default: 49152 to 65535). As per RFC 8656, this is the port range that Coturn will use by default for TURN relay. Again, you can disable either of TCP or UDP (for example, with no-tcp-relay).
Note:
Port ranges do NOT need to match between Coturn and Kurento Media Server.
If you happen to deploy both Coturn and KMS in the same machine, we recommend that their port ranges do not overlap.
- Provide your STUN or TURN server settings to both Kurento Media Server and all WebRTC clients (like web browsers). Check STUN/TURN Server Configuration for ways to configure this in Kurento.
- Check that your Coturn server is working. For that, follow the steps given in the next section.
How to test my STUN/TURN server
To test if your STUN/TURN server is functioning properly, open the Trickle ICE test page. In that page, follow these steps:
- Remove any server that might be filled in already by default.
- Fill in your STUN/TURN server details.
- To only test STUN (TURN relay will not be tested):
stun:<StunServerIp>:<StunServerPort>- To test both STUN and TURN:
turn:<TurnServerIp>:<TurnServerPort>… and also fill in the TURN username and TURN password.
- Click on Add Server. You should have only one entry in the list, with your server details.
- Click on Gather candidates. Verify that you get candidates of type srflx if you are testing STUN. Likewise, you should get candidates of type srflx and type relay if you are testing TURN.If you are missing any of the expected candidate types, your STUN/TURN server is not working well and WebRTC will fail. Check your server configuration, and your cloud provider’s network settings.
How to configure Kurento Media Server
Most (but not all, see below) of the settings in Kurento can be set statically in configuration files:
- /etc/kurento/kurento.conf.json
The main configuration file. Provides settings for the behavior of Kurento Media Server itself.
- /etc/kurento/modules/kurento/MediaElement.conf.ini
Generic parameters for all kinds of MediaElement.
- /etc/kurento/modules/kurento/SdpEndpoint.conf.ini
Audio/video parameters for SdpEndpoints (i.e. WebRtcEndpoint and RtpEndpoint).
- /etc/kurento/modules/kurento/WebRtcEndpoint.conf.ini
Specific parameters for WebRtcEndpoint.
- /etc/kurento/modules/kurento/HttpEndpoint.conf.ini
Specific parameters for HttpEndpoint.
- /etc/default/kurento-media-server
This file is loaded by the system’s service init files. Defines some environment variables, which have an effect on features such as the Debug Logging, or the Core Dump files that are generated when a crash happens.
For other settings not directly available in configuration files, make sure to read the Client API SDK docs, where all exposed methods are documented:
The Kurento Docker images also accept some environment variables that map directly to settings in the above files. If this is not flexible enough, you can always use a bind-mount or volume with a different set of configuration files in /etc/kurento. For some tips about these techniques, go to Kurento in Docker.
STUN/TURN Server
Read When are STUN and TURN needed? to learn about when you might need to use these, and STUN/TURN server install for guidance on how to install your own STUN/TURN server.
Local install
- Set values stunServerAddress and stunServerPort to use a STUN server, or set turnURL to use a TURN server; in /etc/kurento/modules/kurento/WebRtcEndpoint.conf.ini.
Docker
- Pass environment variables KMS_STUN_IP and KMS_STUN_PORT for STUN, or KMS_TURN_URL for TURN.
Client API
- Java: setStunServerAddress and setStunServerPort for STUN, or setTurnUrl for TURN.
- JavaScript: setStunServerAddress and setStunServerPort for STUN, or setTurnUrl for TURN.
Network Interface
To specify the network interface name(s) that KMS should use to communicate from the environment where it is running (either a physical machine, a virtual machine, a Docker container, etc.)
Local install
- Set value networkInterfaces in /etc/kurento/modules/kurento/WebRtcEndpoint.conf.in.
Docker
- Pass environment variable KMS_NETWORK_INTERFACES
Client API
- Java: setNetworkInterfaces.
- JavaScript: setNetworkInterfaces.
RTP Ports
These two parameters define the minimum and maximum ports that Kurento Media Server will bind to (listen) in order to receive remote RTP packets. This affects the operation of both RtpEndpoint and WebRtcEndpoint.
Plain RTP (RtpEndpoint) needs 2 ports for each media kind: an even port is used for RTP, and the next odd port is used for RTCP. WebRTC (WebRtcEndpoint) uses RTCP Multiplexing (rtcp-mux) when possible, so it only uses 1 port for each media kind.
Local install
- Set values minPort, maxPort in /etc/kurento/modules/kurento/BaseRtpEndpoint.conf.ini.
Docker
- Pass environment variables KMS_MIN_PORT, KMS_MAX_PORT.
WebRTC Bitrate
The default MaxVideoSendBandwidth range of the WebRtcEndpoint is a VERY conservative one, and leads to a low maximum video quality. Most applications will probably want to increase this to higher values such as 2000 kbps (2 mbps): Java, JavaScript.
There are several ways to override the default settings for variable bitrate and network bandwidth estimation:
- setMinVideoRecvBandwidth / setMaxVideoRecvBandwidth
- setMinVideoSendBandwidth / setMaxVideoSendBandwidth
- setEncoderBitrate / setMinEncoderBitrate / setMaxEncoderBitrate
- This setting is also configurable in
- This setting is also configurable in
Advanced Settings
These settings are only provided for advanced users who know what they are doing and why they need them. For most cases, the default values are good enough for most users.
ICE-TCP
ICE-TCP is what allows WebRTC endpoints to exchange ICE candidates that use the TCP protocol; in other words, the feature of using TCP instead of UDP for WebRTC communications.
If you have a well known scenario and you are 100% sure that UDP will work, then disabling TCP provides slightly faster times when establishing WebRTC sessions. I.e., with ICE-TCP disabled, the time between joining a call and actually seeing the video will be shorter.
Of course, if you cannot guarantee that UDP will work in your network, then you should leave this setting enabled, which is the default. Otherwise, UDP might fail and there would be no TCP fallback for WebRTC to work.
Local install
- Set value iceTcp to 1 (ON) or 0 (OFF) in /etc/kurento/modules/kurento/WebRtcEndpoint.conf.ini.
Docker
- Set environment variable KMS_ICE_TCP to 1 (ON) or 0 (OFF).
Client API
External IP Address
When this feature is used, all of the Kurento IPv4 and/or IPv6 ICE candidates are mangled to contain the given address. This can speed up WebRTC connection establishment in scenarios where the external or public IP is already well known, also having the benefit that STUN won’t be needed for the media server.
Local install
- Set values externalIPv4, externalIPv6 in /etc/kurento/modules/kurento/WebRtcEndpoint.conf.ini.
Docker
- Pass environment variables KMS_EXTERNAL_IPV4, KMS_EXTERNAL_IPV6.
- If the special value auto is used, then the container will auto-discover its own public IP address by performing a DNS query to some of the well established providers (OpenDNS, Google, Cloudflare). You can review the script here: getmyip.sh. In cases where these services are not reachable, the external IP parameters are left unset.
Client API
- Java: setExternalIPv4.
- JavaScript: setExternalIPv4.
Maximum Transmission Unit
The MTU is a hard limit on the size that outbound packets will have. For some users it is important being able to lower the packet size in order to prevent fragmentation.
For the vast majority of use cases it is better to use the default MTU value of 1200 Bytes, which is also the default value in most popular implementations of WebRTC (see Browser MTU).
Local install
- Set value mtu in /etc/kurento/modules/kurento/BaseRtpEndpoint.conf.ini.
Docker
- Pass environment variable KMS_MTU.
Client API
WebRTC DTLS certificates
By default, Kurento uses a different self-signed certificate for every WebRtcEndpoint (see Media Plane security (DTLS)). If you want or need to use the same cert for every endpoint, first join both your certificate (chain) file(s) and the private key with a command such as this one:
# Make a single file to be used with Kurento Media Server.
cat cert.pem key.pem >cert+key.pem
Then, configure the path to cert+key.pem:
Local install
- Set either of pemCertificateRSA or pemCertificateECDSA with the path to your certificate file in /etc/kurento/modules/kurento/WebRtcEndpoint.conf.ini.
Docker
- Pass environment variables KMS_PEM_CERTIFICATE_RSA or KMS_PEM_CERTIFICATE_ECDSA with the path inside the container. Also, make sure the file is actually found in that path; normally you would do that with a bind-mount, a Docker volume, or a custom Docker image. For more information and examples, check Kurento in Docker.
Other Tools Installation
Update and Upgrade OS
sudo apt update
sudo apt upgrade
Java
LLMeetings needs Java 17 to work. So we install OpenJava 17:
sudo apt install openjdk-17-jre openjdk-17-jre-headless nanoNow, please, select OpenJava 17, if you have more than one java versions installed:
sudo update-alternatives --config javaTo see the active java version:
java -versionLibreOffice
LibreOffice is need it to convert to pdf the uploaded office files.The ubuntu desktop iso have already LibreOffice installed.But we install it specially for server iso:
sudo add-apt-repository ppa:libreoffice/ppa
sudo apt update
sudo apt install libreoffice
ImageMagick and Sox
ImageMagick, will work the image files, png, jpg, gif, etc. Will install it and some more libraries and packages:
sudo apt install -y imagemagick libjpeg62 zlib1g-devWe modify ImageMagick, so OpenMeetings can upload office files to whiteboard:
sudo vi /etc/ImageMagick-6/policy.xml…and comment the two follow lines, near to bottom file:
<policy domain="coder" rights="none" pattern="PS" />
<policy domain="coder" rights="none" pattern="PDF" />
...to:
<!-- <policy domain="coder" rights="none" pattern="PS" /> -->
<!-- <policy domain="coder" rights="none" pattern="PDF" /> -->
Sox, work for the sound. We install it:
sudo apt install soxFFmpeg
FFmpeg will work the video. We install together to vlc for watch the videos:
sudo apt install ffmpeg vlc curlMariaDB database server
MariaDB is the database server. Will install it:
sudo apt install mariadb-serverRun MariaDB:
sudo /etc/init.d/mariadb startNow we give a root password to MariaDB. Please, replace new-password with your own:
sudo mysqladmin -u root password new-passwordMake a database with his own user for OpenMeetings:
sudo mysql -u root -p…will ask for the root password that you have just choosen, type it…
MariaDB [(none)]> CREATE DATABASE open710 DEFAULT CHARACTER SET 'utf8';
MariaDB [(none)]> GRANT ALL PRIVILEGES ON open710.* TO 'hola'@'localhost' IDENTIFIED BY '1a2B3c4D' WITH GRANT OPTION;- open710 ……is the database name.
- hola ………is the user name for this database.
- 1a2B3c4D ..is the password for this user.
You can change the data…but remember it! Later we´ll need it,
…now we leave MariaDB:
MariaDB [(none)]> quitLLMeetings Server Installation
Installation of OpenMeetings
We´ll install OpenMeetings in /opt/open710. All the following information will be based on this directory:
cd /opt…download the tomcat-OpenMeetings file:
sudo wget https://archive.apache.org/dist/openmeetings/7.1.0/bin/apache-openmeetings-7.1.0.tar.gz…uncompress it:
sudo tar xzvf apache-openmeetings-7.1.0.tar.gz…and rename the obtained folder:
sudo mv apache-openmeetings-7.1.0 open710…and we do to “nobody” user ownner of OpenMeetings installation folder:
sudo chown -R nobody:nogroup /opt/open710Download and install the connector between OpenMeetings and MariaDB:
cd /opt
sudo wget https://repo1.maven.org/maven2/mysql/mysql-connector-java/8.0.30/mysql-connectorjava-8.0.30.jar
…and copy it to where must be:
sudo cp /opt/mysql-connector-java-8.0.30.jar /opt/open710/webapps/openmeetings/WEB-INF/libScript to launch Tomcat-OpenMeetings
Please, download the tomcat-OpenMeetings run script:
cd /opt
sudo wget https://cwiki.apache.org/confluence/download/attachments/27838216/tomcat34
…copy it to:
sudo cp tomcat34 /etc/init.d/…and concede permission of execution:
sudo chmod +x /etc/init.d/tomcat34If you would made the installation in any other different path to /opt/open710, please edit the script and modify the line:
CATALINA_HOME==/opt/open710…to
CATALINA_HOME==/your-path-installationRun Tomcat-OpenMeetings
Start MariaDB, if it is still not:
sudo /etc/init.d/mariadb startYou can check if it is up:
sudo netstat -anp|grep 3306…and now start Tomcat-OpenMeetings:
sudo /etc/init.d/tomcat34 startYou can check if it is up:
sudo netstat -anp|grep 5443…wait 30 seconds at least, in order that tomcat runing completely. And after this, you can go to:
https://localhost:5443/openmeetings
…there will appear a page similar to this one:
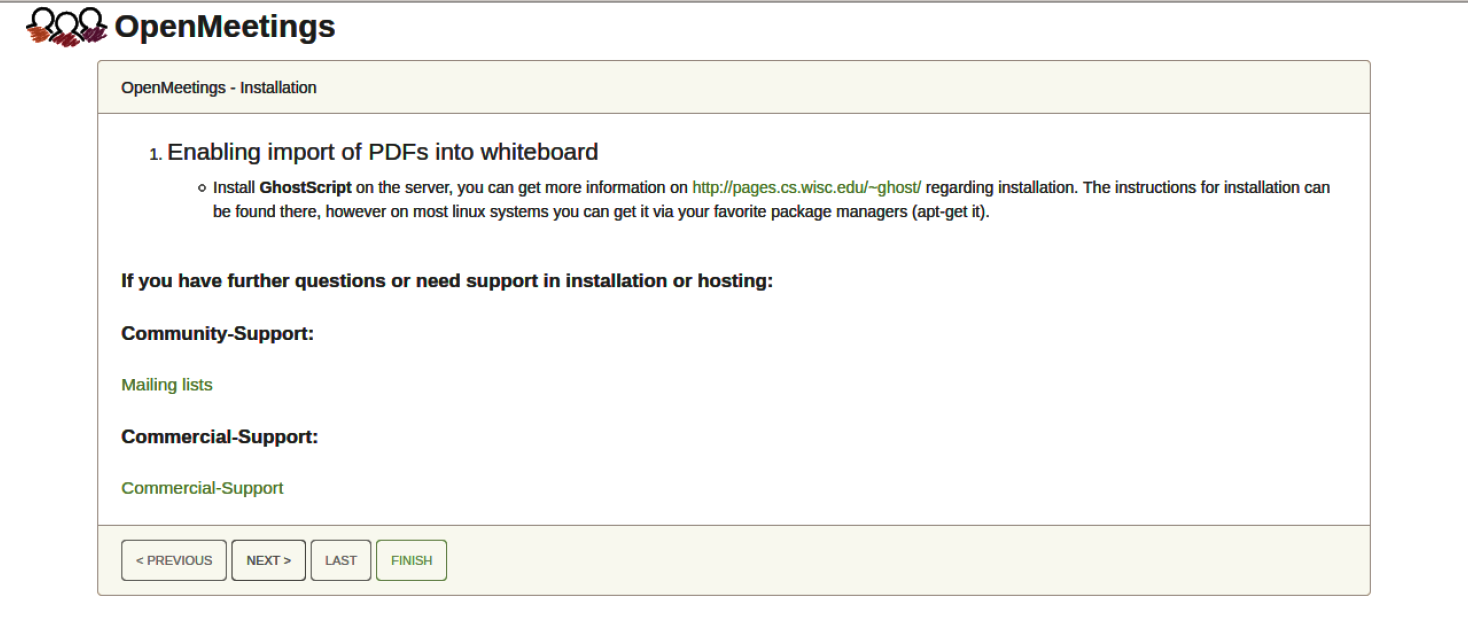
…press on “Next >” button (bottom), and will show the default database configuration
with H2, but we employ MySQL (MariaDB),
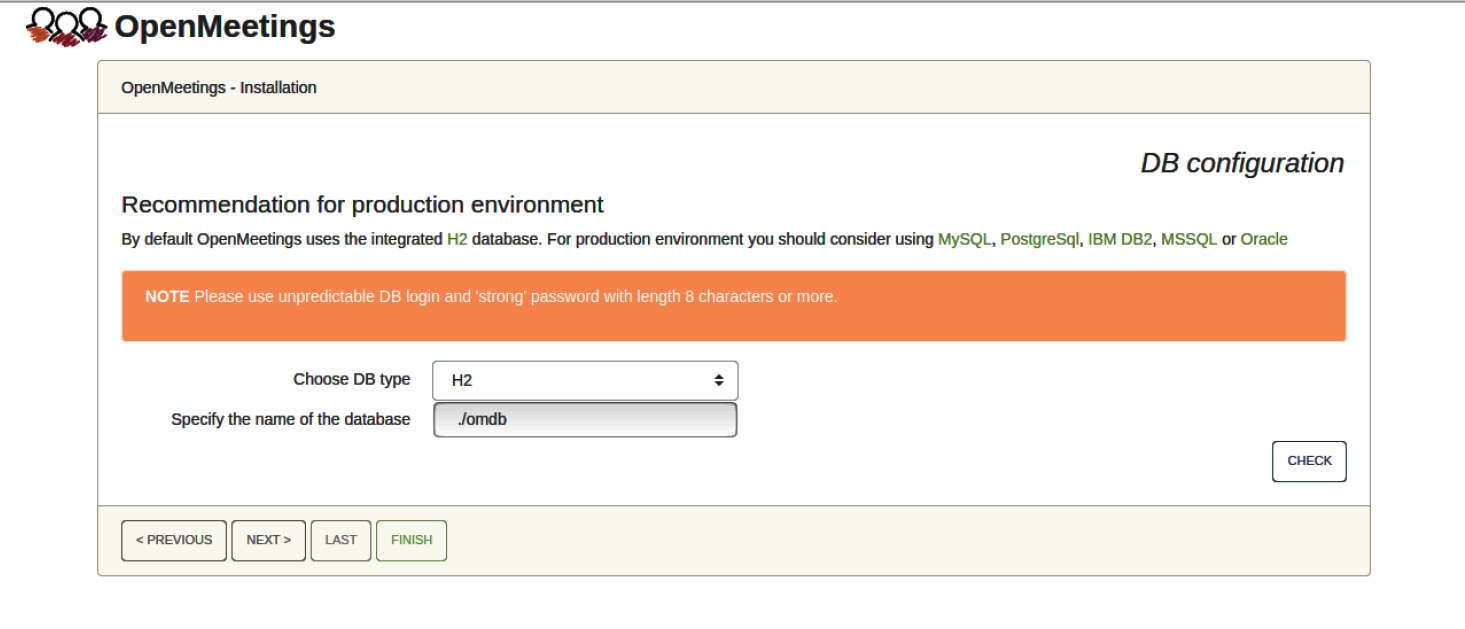
…then, scroll and Choose DB type to MySQL:
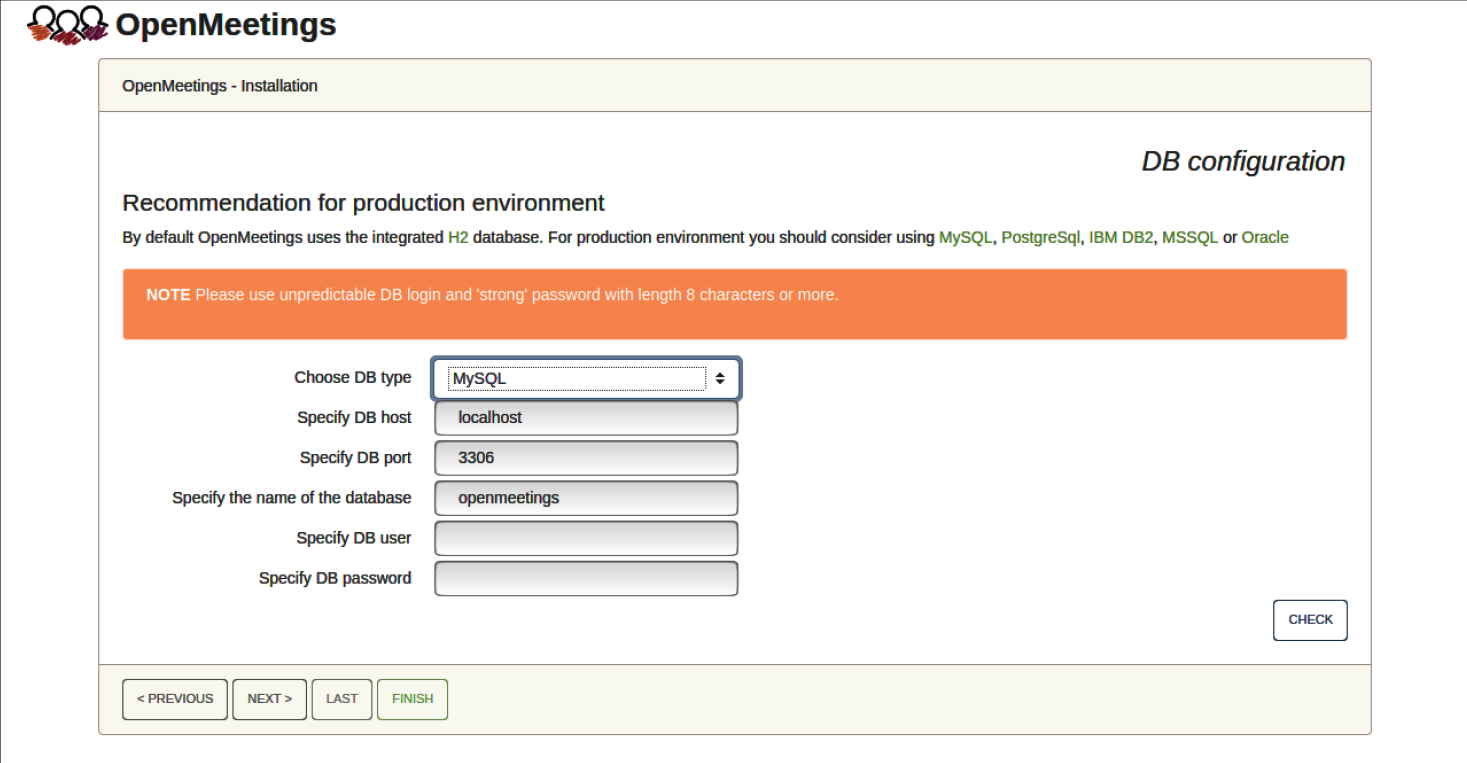
Now we must introduce the database name, user name and his password, we did at the MariaDB database server installation
Specify the name of the database = open710
Specify DB user = hola
Specify DB password = 1a2B3c4D
…if you choose any other data, please type it here. Please push “Next >” button, and will go to:
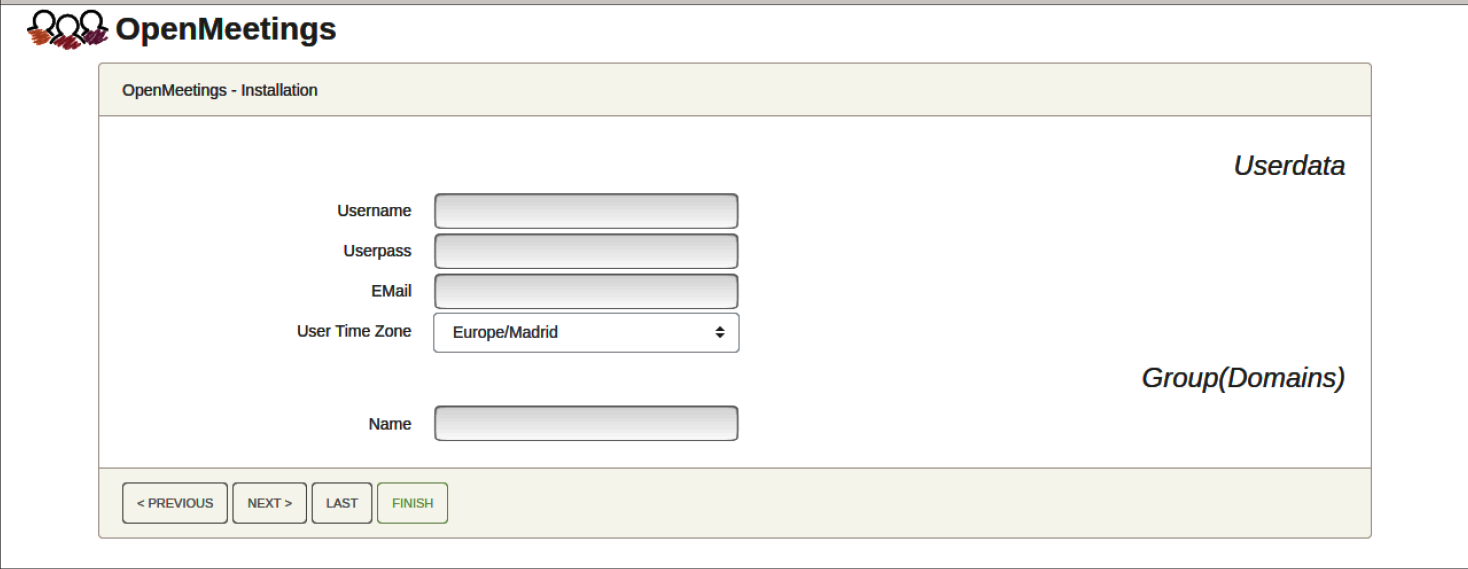
Here, we must introduce a user name for OpenMeetings, and his password. This must have 8 digits minimum, and at least 1 special symbol like: + ( % # ! …etc.
Username = a-name …this user will be administrator.
Userpass = password …for the previous user.
Email = email-adress …of the previous user.
User Time Zone = country where is this server.
Name = example-openmeetings …group name to choose.
Write down your username and password on a piece of paper, then it will be used to access OpenMeetings later.
Press the button “Next >” and will lead us to a new page (below) where you can select the language for your OpenMeetings server, as well as other options such as the configuration of the mail server being used to send invitations or meetings from OpenMeetings:

A valid example to configure the mail server with Gmail, is as follows:
(replace john@gmail.com with your real Gmail account)
Mail-Refer == john@gmail.com
SMTP-Server == smtp.gmail.com
SMTP-Server Port (default Smtp-Server Port is 25) == 587
SMTP-Username == john@gmail.com
SMTP-Userpass == password of john@gmail.com
Enable TLS in Mail Server Auth == …turn green the button to activate
Default Language == …select your language
…the rest you can change it as you likes.
Now press the button “Next >” and a new page will appear:
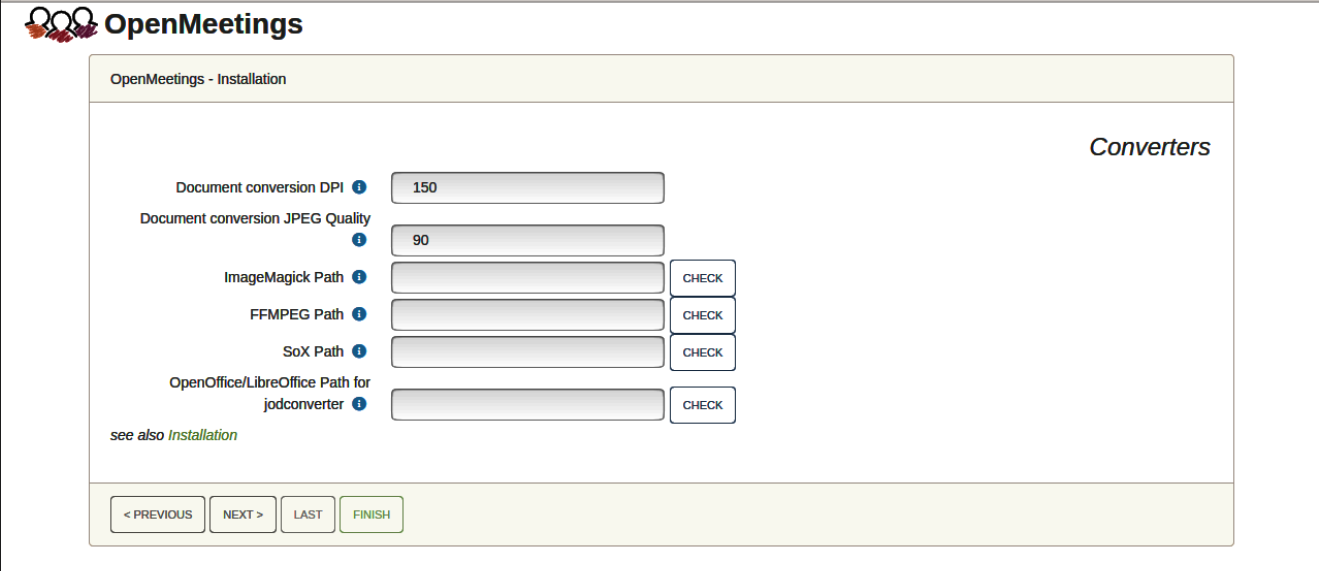
Here we´ll introduce the respective paths for the image, video, audio and conversion of uploaded files:
ImageMagick Path == …here empty
FFMPEG Path == …here empty
SOX Path == …here empty
OpenOffice/LibreOffice Path for jodconverter == /usr/lib/libreoffice
As you go introducing paths, you can check if they are correct by pressing the button labeled Check.
Once completed the paths, please click the button “Next >” and move on to another page that we will leave as is:
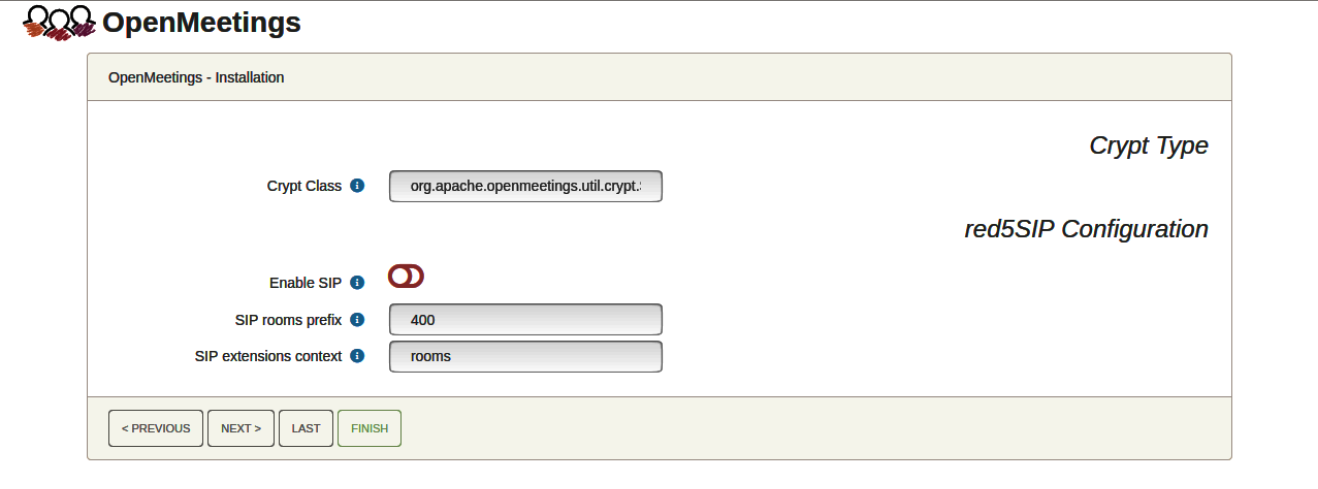
Now push the button “Next >” and will show this window:
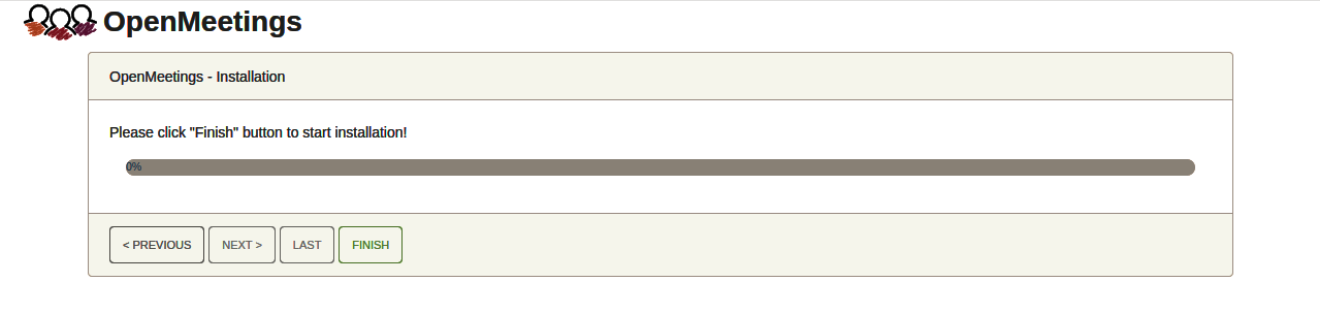
Press the “Finish” button …wait for a few seconds until the tables are filled in the database.
When this has concluded, another page will appear. Don´t click on Enter the Application. First, we need to restart the server:
sudo /etc/init.d/tomcat34 restart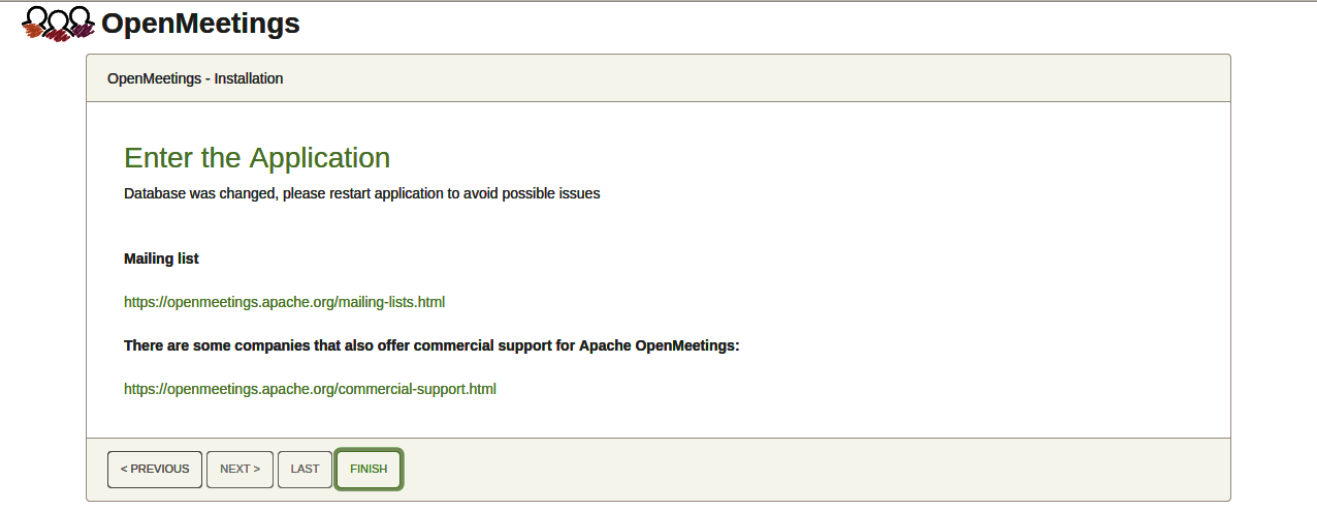
Now yes, you can clic on Enter the Application, or go with your browser to:
https://localhost:5443/openmeetings/
…and will take us to the entry of OpenMeetings:
Configure LLMeetings
Renaming /openmeetings context
Following these steps to configure LLMeetings
stop openmmetings if it is running
sudo /etc/init.d/tomcat34 stopgo to openmeetings install dir
cd /opt/open710rename openmeetings to llmeetings
sudo mv webapps/openmeetings /webapps/llmeetingsopen /opt/open710/webapps/root/index.html using your favorite text editor
sudo vi /opt/open710/webapps/root/index.htmlind and modify <meta http-equiv=”REFRESH” content=”0;url=openmeetings/”> to be <meta http-equiv=”REFRESH” content=”0;url=llmeetings/“>
Changing hard-coded application name in string labels
To have llmeetings instead of Openmeetings in all text labels you need to do the following:
- ensure {0} placeholder is used in all strings you have added and/or modified (all strings bundled into Openmeetings already have this placeholder)
- login to LLMeetings as user with administrator privileges
- go to Administration -> Configuration
- find and edit configuration with name application.name
- Set its value to be LLMeetings
- Save
- reload page or relogin